Put Out A P0420 CEL With $6

Unlike other CEL codes a P0420 and P0430 is not a actual failure code, its a warning that the catalyst efficiency has gone below the threshold set by the manufacturer. Newer auto manufactures set this at 90-95% (good). An actual catalytic converter "failure" has no code. A failure would be a fracturing or clogging of the catalyst media, a broken or rusted shell causing an exhaust leak. That would be accompanied by other symptoms like bad engine performance, stalling, or the catalyst efficiency threshold warning code.

The catalyst efficiency threshold set by the manufacturers is generic and does not consider the smog requirements of each state. Each state has different smog emission standards. They can be lower, higher, or not at all. Because the catalyst efficiency settings don't match the states smog requirements, you can fail the inspection for a catalyst efficiency CEL, yet pass the state smog test. Many state inspections today skip the smog tests for an OBD-II computer status check. Regardless, prior to inspection you need to extinguish all CEL's.

There are several causes for a P0420 starting with oil consumption. But we won't get into that, this discussion is about extinguishing the CEL for $6 using something called a spark plug anti fouler. The spark plug anti-fouler (also called non fouler) does not influence or change any any of the smog test emission results. The anti-fouler is not a repair to the catalytic converter so one day you will fail the state smog emissions test. Or it will plug up on you, causing stalling, etc. It is then you will need to replace the cat. But because the CEL first appears at  90-95% (good), replacing the catalytic converter could be years from now.

How it works
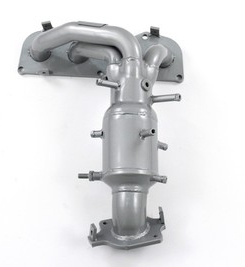
The pre-cat (upstream, front) O2 sensor takes an initial reading of exhaust gasses. The post-cat (downstream, rear) O2 sensor takes a second reading. The ECU compares the two. If the difference is small, the catalyst efficiency is low and you get the CEL. If the difference is large the catalyst efficiency is high, no CEL. Moving the post-cat (downstream, rear) O2 sensor out of direct exhaust flow will will result in a reading of less exhaust gas coming out of the catalytic converter. The ECU will calculate the difference as large = high efficiency. Out goes the light after a few driving cycles.

Installation
  1. Purchase the correct size Dorman HELP! spark plug anti-fouler thread size for your car. The O2 thread size is usually the same as your spark plug. There will be 2 in the package.
  2. Remove the post-cat (downstream, rear) O2 sensor and test that the thread size is correct. Don't tighten too far yet! What you will notice is the sensor tip is too long to completely screw into the anti fouler.
  3. Drill out the end of ONE anti-fouler with a 1/2" drill bit so the sensor tip can fit through.
  4. Screw the anti-fouler into your O2 sensor and screw the anti-fouler into the exhaust. 
 Note: The CEL should go out in a day or two. If not, try screwing the second un-drilled anti-fouler over the top of the drilled anti-fouler to block it off further. I recommend using just one if possible. 
Posted on 3:36 PM / 0 comments / Read More

Which Fuel Injector Cleaner Works Best?

With so many fuel injector, fuel system cleaners on the market today, which works best? Lets discuss a few. But first, a short discussion about the additives in fuel system cleaners. Most fuel system, fuel injector cleaners contain an "upper cylinder lube" and a "solvent" in varying strengths. 

Upper Cylinder Lube
Lead was added to the fuel to reduce engine detonation (pinging), lubricate the valves, rings and cylinder walls of engine designs from the pre-1980's. When unleaded gas appeared on the scene, additives containing "upper cylinder lube" were widely used for older cars to substitute for the lack of lead. These lubricants were primarily high flash oils that could survive combustion and lubricate parts.

Over time auto manufacturers produced valves and rings out of harder alloys to reduce wear. Along came ethanol. There is no proof to support this, but it is widely thought that ethanol reacts with engine oil resulting in a lack of lubrication for the cylinder walls, rings and valves. So the fears of upper cylinder wear remain today, and so do high levels of upper cylinder lube in some products. Modern engines are designed to run on today's gasoline. Some are flex fuel, some have oil jets to add motor oil to cylinder walls, some run very thin oils that get to places older thicker oils could not. So today, the fear is not justified.

All engines today have catalytic converters to reduce emissions. Catalytic converter burn off exhaust gasses using exhaust heated catalyst media. Oil reduces the surface temperature of the catalyst media, reducing its efficiency. a high flash oil that results combustion temperatures will surely survive the lesser temperatures of the catalytic converter. That spells trouble and the spelling is P0420. For these reasons above a fuel injector cleaner that is low in upper cylinder lube is more desirable for a modern engine.

Cleaning Solvents
Since 1930 fuel system cleaners have used the additive Naphtha and Stoddard Solvent as the primary solvents to combat carbon deposits. Recent modern tests have shown that the additive Polyether Amine (known as PEA) is more effective at cleaning carbon deposits than the Naphtha and Stoddard Solvent based products.

Summary
A fuel system or fuel injector cleaner low in upper cylinder lube and high in PEA is the best choice for a modern engine. Here are a few of the most popular fuel injector, fuel system cleaners catagorized by % of lube and type of solvent:

Mostly upper Cylinder Lube, Naphtha or Stoddard Solvent
  • Seafoam
  • Marvel Mystery Oil
Mostly PEA Solvent, little or no upper cylinder lube
  • Techron Concentrate Plus
  • Red Line Si-1
  • Gumout Regane (not other gumout products)

Posted on 8:23 PM / 0 comments / Read More

Cleaning your VVT with Kreen

Variable Valve Timing (VVT) has become a staple of most modern engine designs. VVT operation depends on hydraulic oil pressure from a long winding path of tiny oil passages known as "vanes". Oil for the VVT system is filtered through a tiny screen, then passed to the Oil Control Valve (OCV). The OCV allows oil to pass on to the to the VVT controller/actuator. The oil pressure turns the controller which advances or retards the intake and exhaust cams. The ECU decides how much to open or close the OCV based on engine revolutions, throttle position, engine coolant temperature and intake air volume. Oil pressure is regulated, which turns the actuator to different positions.

Vulnerable deposits, a dirty VVT system can impact engine performance, gas mileage and give you annoying ticks. This is especially noticeable at startup. Changing the oil on time and the use of premium synthetic oils go a long way to keeping the system clean. But there are times where manual intervention is necessary. Before you start tearing the VVT system apart, try an oil additive called Kreen from Kano Labs. Its an industrial cleaner not sold retail, as it can be hazardous if not handled properly. Kreen is very effective at reducing hardened carbon deposits and varnish. Not a fast flush, Kreen can be added to the oil and driven while the cleaning process takes place.

The way I use Kreen is adding 3oz per qt of oil for 1,000 miles, change the oil. So for example if you change your oil every 5,000 miles you would add Kreen at 4,000. I also suggest use outside or in a well ventilated area, and transfer Kreen from its aluminum container to a glass bottle.

Kreen can also be used as a piston soak and in the gas as a fuel system cleaner. Using this product every 30,000 miles will give you a trouble free quiet VVT system. 
Posted on 4:36 PM / 0 comments / Read More

Thick oil and the VVT-i startup tick

If you own a late model Toyota you may have noticed a 1-2 second ticking noise at startup. While there could be other mechanical problems, most of the time the culprit is a stuck/locked VVT-i controller. What can I do to resolve this? In some cases its an actual controller failure. But for most its oil selection.

Its called Variable Valve Timing because its always running. From the second the engine starts, VVT is attempting to adjust to conditions. When it can't, gets stuck, it will tick for 1-2 seconds. Unlike Honda's VTEC that uses two sets of cam shaft profiles – one for low and mid range rpm and another for high rpm operation, VVT camshaft timing is varied using oil pressure according to engine revolutions, throttle position, engine coolant temperature and intake air volume.

VVT operation depends on hydraulic oil pressure that arrives through a long winding path of tiny oil passages. So tiny they are known as "vanes". Its critical the system stays clean. Its critical the system maintains proper oil flow and pressure as fast as possible to prevent that annoying startup tick.

Proper lubrication comes from a combination of oil pressure, flow, and film strength between moving parts. Oil pressure by itself is no indication of proper engine lubrication. Oil pressure is managed by the oil pump and relief valve. Thick oil will have higher pressure because there is more resistance to flow. Too high and it will flow out the oil pump relief valve back to the sump, lubricating nothing including the VVT system.

As stated above, thick oil will have higher pressure because there is more resistance to flow. Add that to the tiny "vanes" of the VVT system and you have a oil flow lag as compared to the rest of the engine. By as much as 1-2 seconds. No coincidence that's the duration of the noise.

Modern thin oils have better flow, better viscosity modifiers to manage film strength. That means better lubrication and cooling, keeping pressure within spec. Tthin as possible is a good thing, especially for the VVT-i system.. "Thin as possible" meaning some older engines have mechanical issues like wear/higher tolerances, valve seals, rings, etc. causing oil consumption that may prevent its use.
Posted on 12:11 PM / 0 comments / Read More

Monroe Quick-Strut

Quick-Strut®: Complete, Ready-To-Install Replacement Strut Assembly

THE FIRST COMPLETE, READY-TO-INSTALL STRUT ASSEMBLY

Do The Job Right, The First Time!


QUICKER - No need to take apart existing strut assembly.
SAFER - No need to compress coil springs.
EASIER - No specialized tools needed.
Limited Lifetime Warranty.

The revolutionary Monroe Quick-Strut unit is the first complete, ready-to-install replacement strut assembly available! Monroe Quick-Strut units include all the components required for strut replacement in a single, fully-assembled unit. They feature pre-assembled replacement bearing plate, upper and lower spring isolators, upper spring seat, coil spring, boot kit, and a premium strut.

This breakthrough design saves on installation time by eliminating having to disassemble components and compress the coil spring prior to installation. Each Monroe Quick-Strut assembly features application-engineered valving to optimize each vehicle's unique ride and handling characteristics. Available for popular passenger car, light truck and SUV applications.
Posted on 10:39 AM / 0 comments / Read More

Synthetic Oil

All Additives

Recommended Additives

Best Oil Filters

 
Copyright © 2012. You DIY Auto . All Rights Reserved